Google Workspace (formerly known as G Suite)
This guide covers the basics of setting up Pomerium to use GCP and Google Workspace / G Suite as your identity provider.
caution
Google changes their configuration screens frequently. Please refer to Google's documentation for authoritative instructions.
Setting up OAuth 2.0
You need OAuth 2.0 credentials, including a client ID and client secret, to authenticate users.
Create OAuth 2.0
Log in to your Google account and go to the APIs & services.
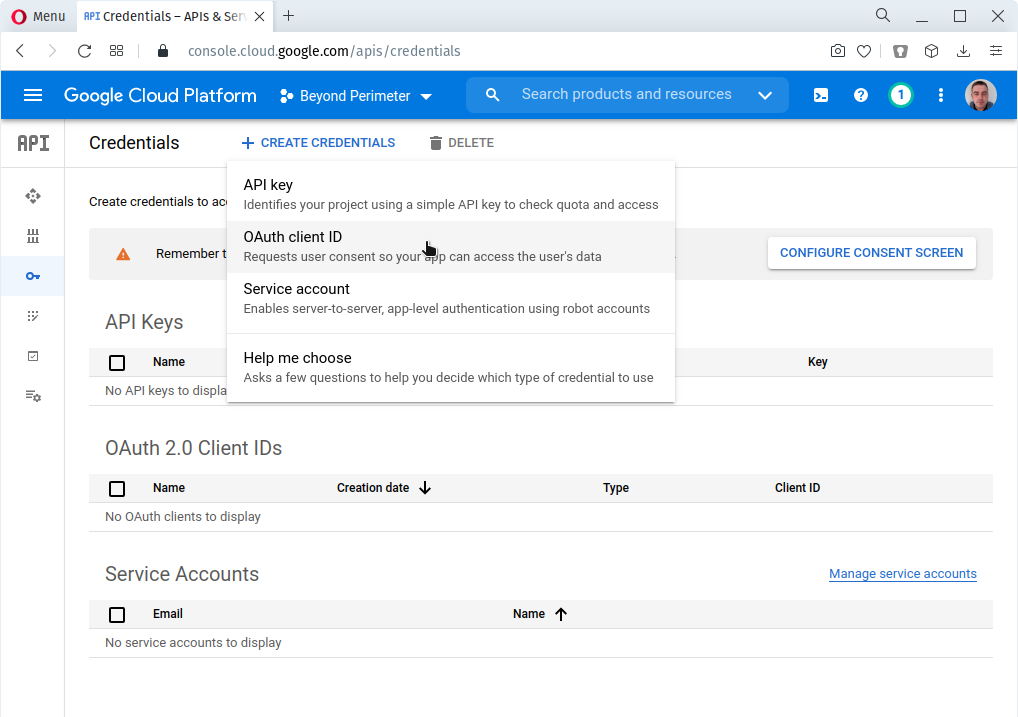
- Navigate to Credentials using the left-hand menu.
- On the Credentials page, click Create credentials and choose OAuth Client ID.
caution
If you don't currently have an OAuth consent page configured, Google will not allow you to create credentials until this is completed. Please follow Google's instructions for doing so.
Set a redirect URI
The redirect URI that you set in the API Console tells Google where Pomerium's authentication callback URL is. On the Create Client ID page, select Web application.
To create, view, or edit the redirect URIs for a given OAuth 2.0 credential, do the following:
- Go to the Credentials page.
- In the OAuth 2.0 client IDs section of the page, click a credential.
- View or edit the redirect URIs.
If there is no OAuth 2.0 client IDs section on the Credentials page, then your project has no OAuth credentials. To create one, click Create credentials.
| Field | Description |
|---|---|
| Name | The name of your web app |
| Redirect URI | Redirect URL https://${authenticate_service_url}/oauth2/callback (e.g.https://authenticate.localhost.pomerium.io/oauth2/callback) |

Setting up directory Sync
Create a service account
In order to have Pomerium validate group membership, we'll also need to configure a service account with G-suite domain-wide delegation enabled.
- Open the Service accounts page. If prompted, select a project.
- Click add Create Service Account, enter a name and description for the service account. You can use the default service account ID, or choose a different, unique one. When done click Create.
- The Service account permissions (optional) section that follows is not required. Click Continue.
- On the Grant users access to this service account screen, scroll down to the Create key section. Click add Create key.
- In the side panel that appears, select the format for your key: JSON.
- Click Create. Your new public/private key pair is generated and downloaded to your machine; it serves as the only copy of this key. For information on how to store it securely, see Managing service account keys.
- Click Close on the Private key saved to your computer dialog, then click Done to return to the table of your service accounts.
Next, we need to enable enable G Suite domain-wide delegation, follow these steps:
- Locate the newly-created service account in the table. Under Actions, click Edit.
- In the service account details, click expand_more Show domain-wide delegation, then ensure the Enable G Suite Domain-wide Delegation checkbox is checked.
- If you haven't yet configured your app's OAuth consent screen, you must do so before you can enable domain-wide delegation. Follow the on-screen instructions to configure the OAuth consent screen, then repeat the above steps and re-check the checkbox.
- Click Save to update the service account, and return to the table of service accounts. A new column, Domain-wide delegation, can be seen. Click View Client ID, to obtain and make a note of the client ID.
Set the impersonating user
Then, you'll need to manually open an editor and add an impersonate_user field to the downloaded public/private key file. In this case, we'd be impersonating the admin account user@pomerium.io.
caution
Google requires that service accounts act on behalf of another user. You MUST add the impersonate_user field to your json key file.
{
  "type": "service_account",
  "project_id": "pomerium-redacted",
  "private_key_id": "e07f7c93870c7e03f883560ecd8fd0f4d27b0081",
  "private_key": "-----BEGIN PRIVATE KEY-----\\n-----END PRIVATE KEY-----\n",
  "client_email": "redacted@pomerium-redacted.iam.gserviceaccount.com",
  "client_id": "101215990458000334387",
  "auth_uri": "https://accounts.google.com/o/oauth2/auth",
  "token_uri": "https://oauth2.googleapis.com/token",
  "auth_provider_x509_cert_url": "https://www.googleapis.com/oauth2/v1/certs",
  "client_x509_cert_url": "https://www.googleapis.com/robot/v1/metadata/x509/redacted%40pomerium-redacted.iam.gserviceaccount.com",
+  "impersonate_user": "user@pomerium.com"
}
The base64 encoded contents of this public/private key pair json file will used for the value of the IdP service account configuration setting.
Set directory permissions for Workspaces
Next, we need to give that service account permissionson the GSuite / Workspace side of the house.
- From your Google Workspace domain's Admin console, go to Main menu > Security > API controls.
- In the Domain wide delegation pane, select Manage Domain Wide Delegation.
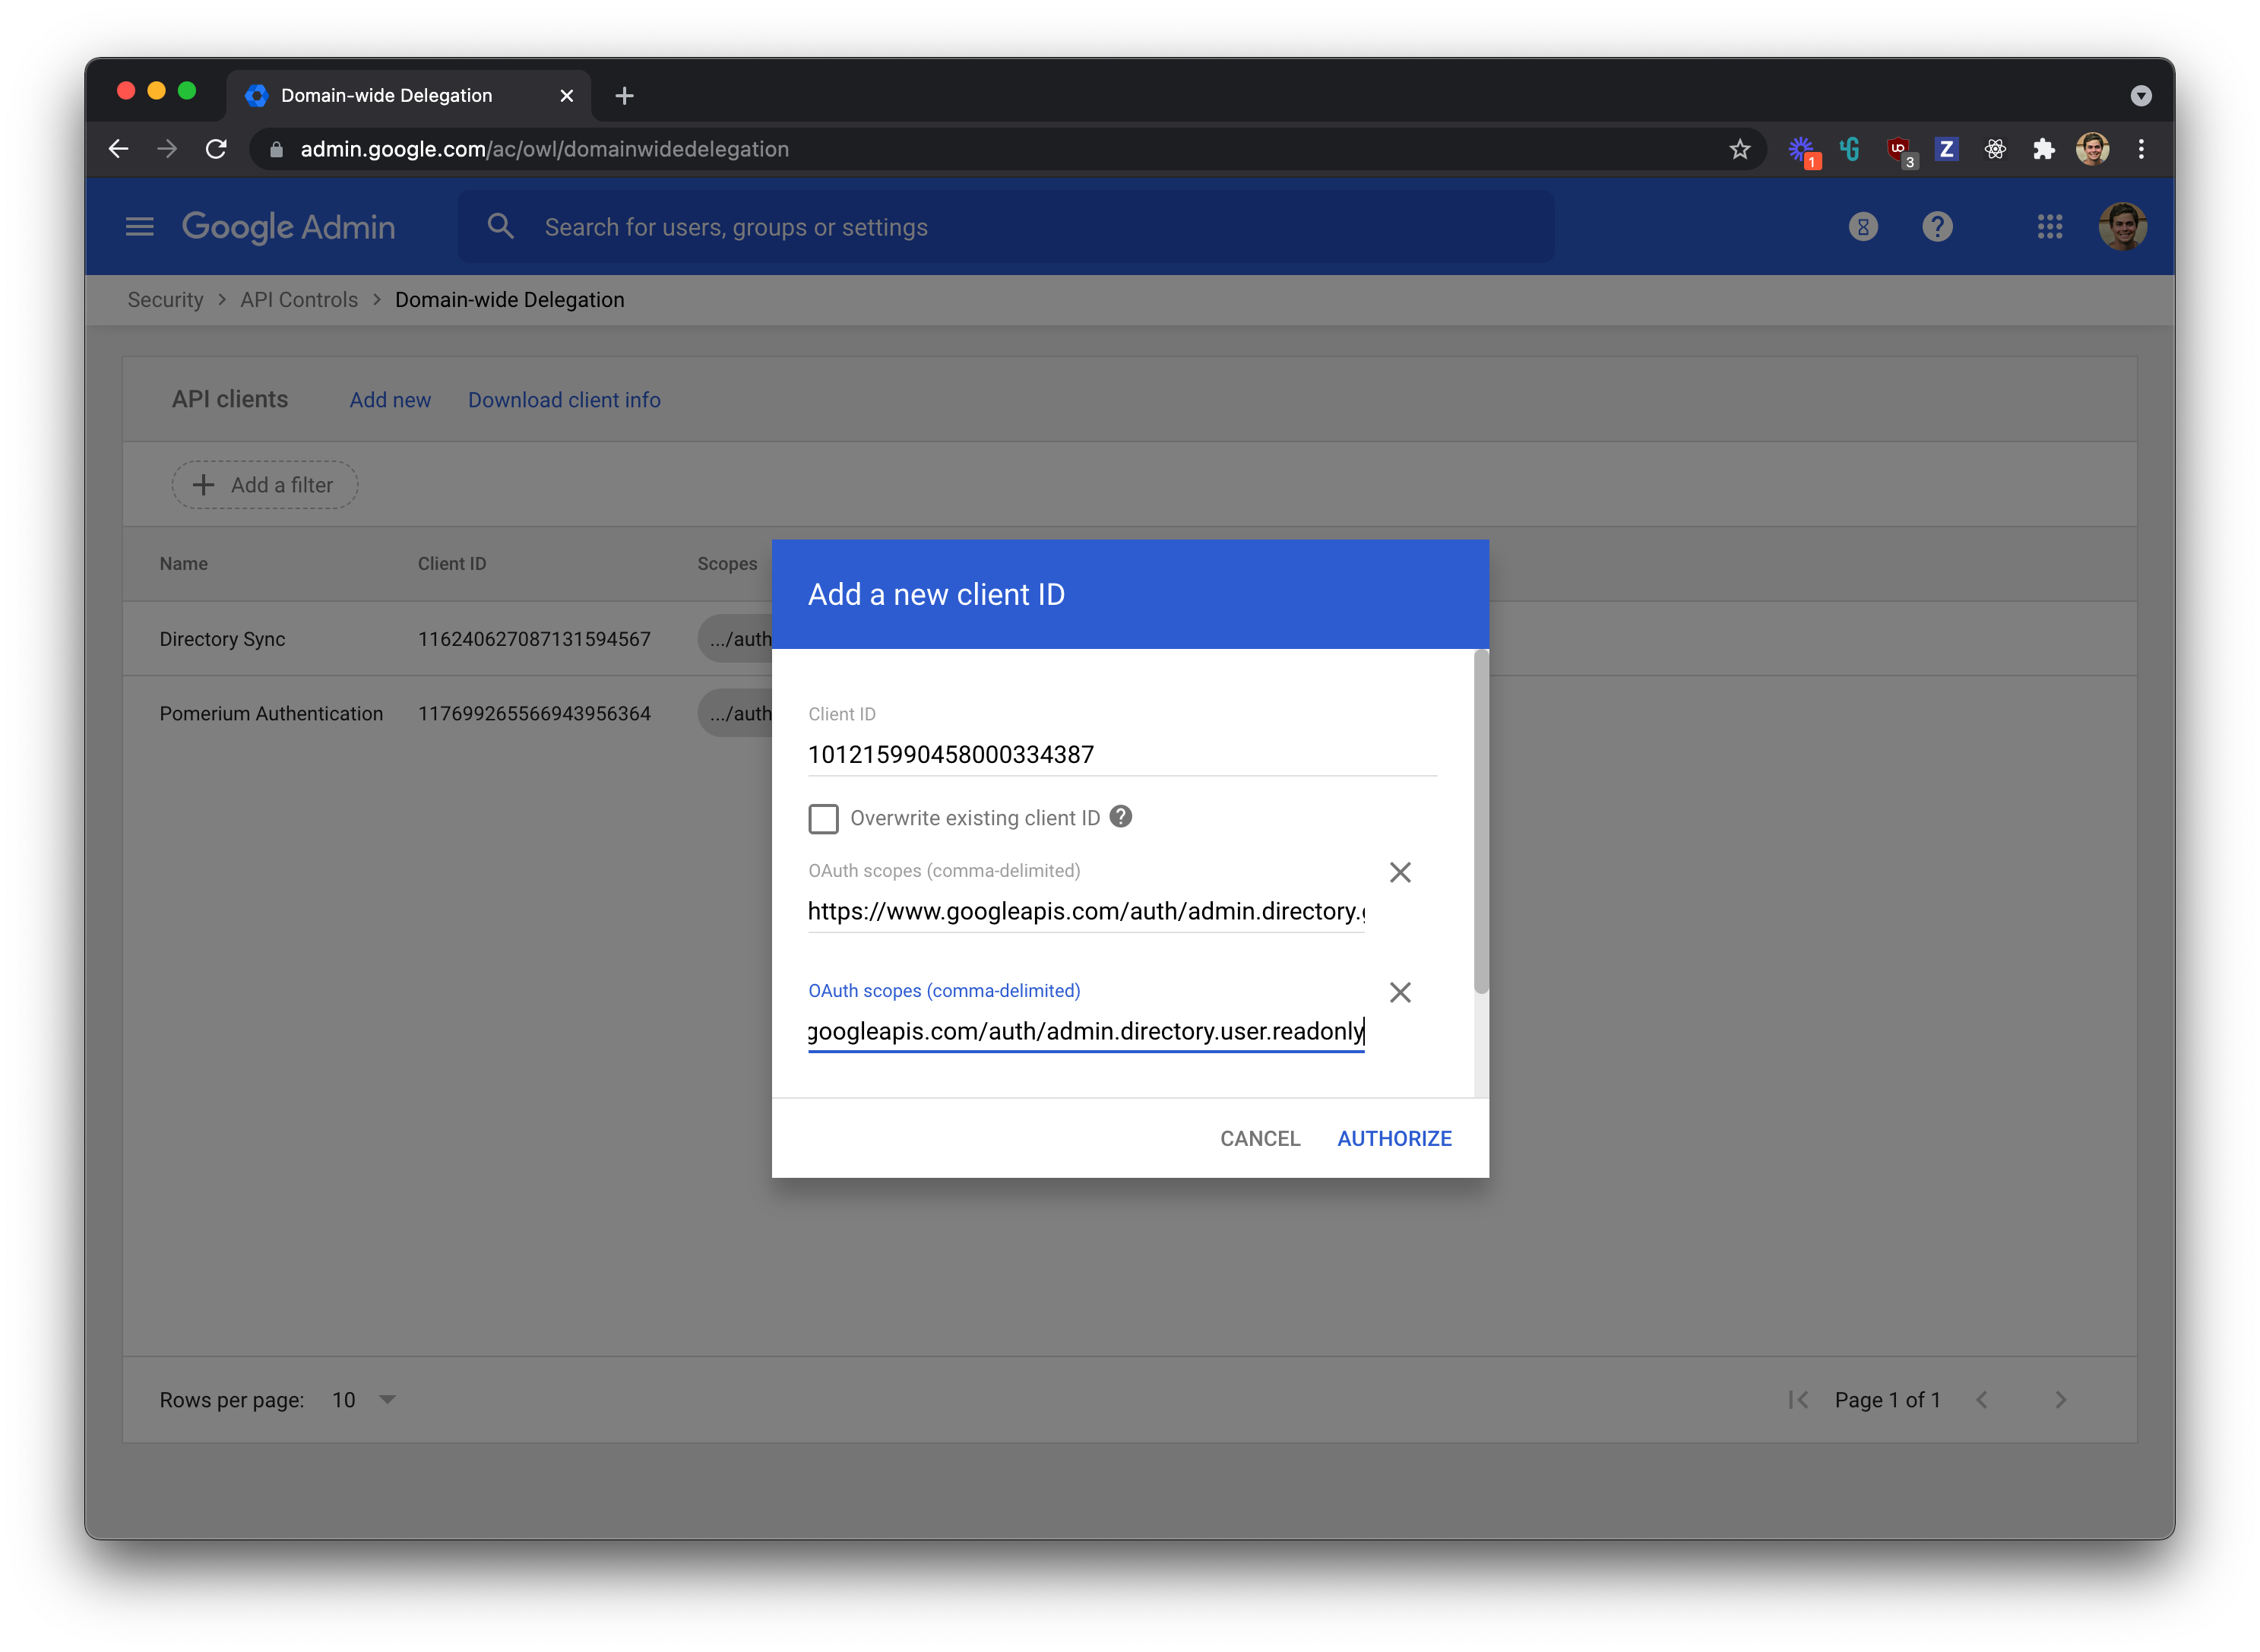
- Click Add new.
- In the Client ID field, enter the client ID obtained from the service account creation steps above.
- In the OAuth Scopes field, enter a comma-delimited list of the scopes required for your application (for a list of possible scopes, see Authorize requests).
- Enter the following list of scopes:
https://www.googleapis.com/auth/admin.directory.group.readonlyhttps://www.googleapis.com/auth/admin.directory.user.readonly - Click the Authorize button.
Your config.yaml values or environment variables should look something like this:
- config.yaml
- Environment Variables
idp-provider: "google"
idp-client-id: "yyyy.apps.googleusercontent.com"
idp-client-secret: "xxxxxx"
idp-service-account: "zzzz" # output of `base64 -i service-account-key.json`, with impersonate_user set.
IDP_PROVIDER="google"
IDP_CLIENT_ID="yyyy.apps.googleusercontent.com"
IDP_CLIENT_SECRET="xxxxxx"
IDP_SERVICE_ACCOUNT="zzzz" # output of `base64 -i service-account-key.json`, with impersonate_user set.
Troubleshooting
invalid service account for Google directory provider
This error message in Pomerium log output coincides with an empty Groups field in the /.pomerium endpoint. It indicates that your service account is missing or incorrectly configured. Revisit the linked section above to adjust your service account settings as needed.